How To Use HashiCorp Vault
This guide is a small howto about storing your secrets using HashiCorp Vault. Following prerequisites have to be met:
- your product-team must have been onboarded to Catena-X NG GitHub organization
For guidance of how to use secret with an ArgoCD application, please refer to How To Use Vault Secrets With ArgoCD.
The Catena-X Vault instance URL is: https://vault.demo.catena-x.net
Login
There are multiple ways to login to Vault. The following sections describe the differences and how to use these methods.
Login via OIDC (preferred method)
OIDC is the preferred login method for Vault, since you do not need to create additional credentials for our tooling. Instead, we configured OIDC to authenticate your user via GitHub login. As advantage over the GitHub token login method, you do not need to create a personal access token.
Login to web UI via OIDC
If you want to edit or view secrets via Vaults web UI, you are not logged in yet and want to do that via OIDC, you can select the OIDC login method like shown in the following screenshot.
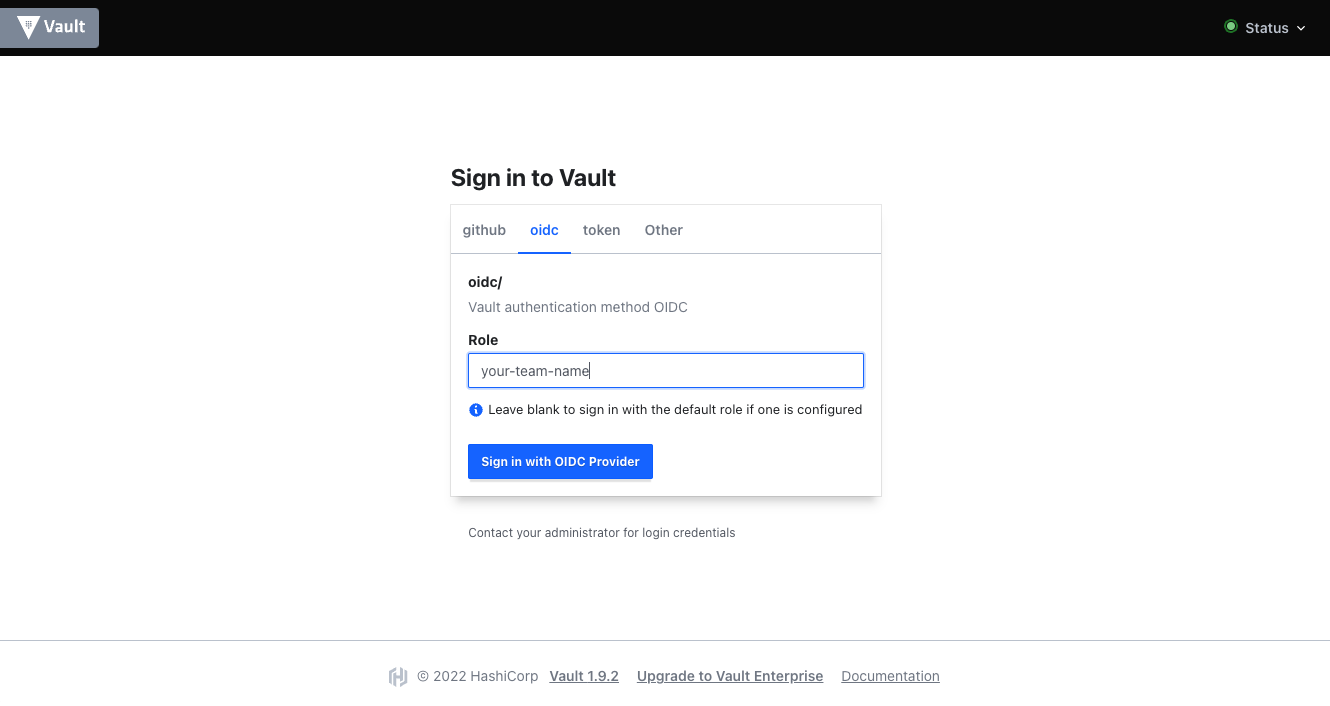
Unfortunately, Vault does not automatically match your GitHub team to your linked policies. Therefore, you need to specify your team name (i.e. 'product-team-example') as 'Role', when logging in.
After you hit the 'Sign in' button, a PopUp will appear asking you about access permissions to your GitHub profile information, like you know it from different OIDC logins. Accepting that will log you in and redirect you to the available secret engines.
Login to vault CLI via OIDC
You can also use OIDC as login method for the Vault CLI. The login then needs a local port on your machine, that it can use for a browser redirect and the role you want to log in as parameters. The port you need to use is '8250', since it is the only one configured as allowed redirect port. Adapt the following snippet to your needs to log in to Vault via CLI with the OIDC method:
export VAULT_ADDR="https://vault.demo.catena-x.net:443"
vault login -method=oidc port=8250 role=<my-github-team-name>
This will pop up a new browser window, where you need to grant access to your GitHub profile information.
Troubleshooting OIDC login
There are some minor issues, that could prevent you from successfully logging in to Vault via OIDC. Here is a short list of things you can try, if nothing happens on the OIDC login page:
- Manually click sign in -> The web UI does not respond to the 'Enter' key
- You've misspelled your team name -> Vault won't show you an error on the UI if the role you specified does not exist
If you checked the mentioned things and still cannot sign in, feel free to open a support ticket, or contact us via CoP channel.
Login via GitHub PAT
This section describes, how you can use a GitHub personal access token (PAT) to log in to Vault.
Create GitHub Token
To be able to use GitHub Token as login method with Vault you have to create a personal token with appropriate permissions granted. To create a personalized token:
- navigate to the Developer settings on GitHub Settings / Developer settings / Personal access tokens.
- click on Generate new token in the upper right corner
- add a Note that fits your needs (this helps you to identify the intent of the token later)
- select an Expiration date
- grant read:org permissions to your token
- click on Generate token at the bottom of the form.
After these steps GitHub will show you the token.
GitHub will show the token only once after creation. If you miss to safe the token in any kind you'll have to generate a new token and revoke the old one for security reasons.
We strongly suggest using a password manager like KeePass (or any other password manager) to store personal sensitive data.
Login to web UI via GitHub PAT
If you want to edit or view secrets via Vaults web UI, you are not logged in yet and want to do that via GitHub PAT, you can select the github login method like shown in the following screenshot.
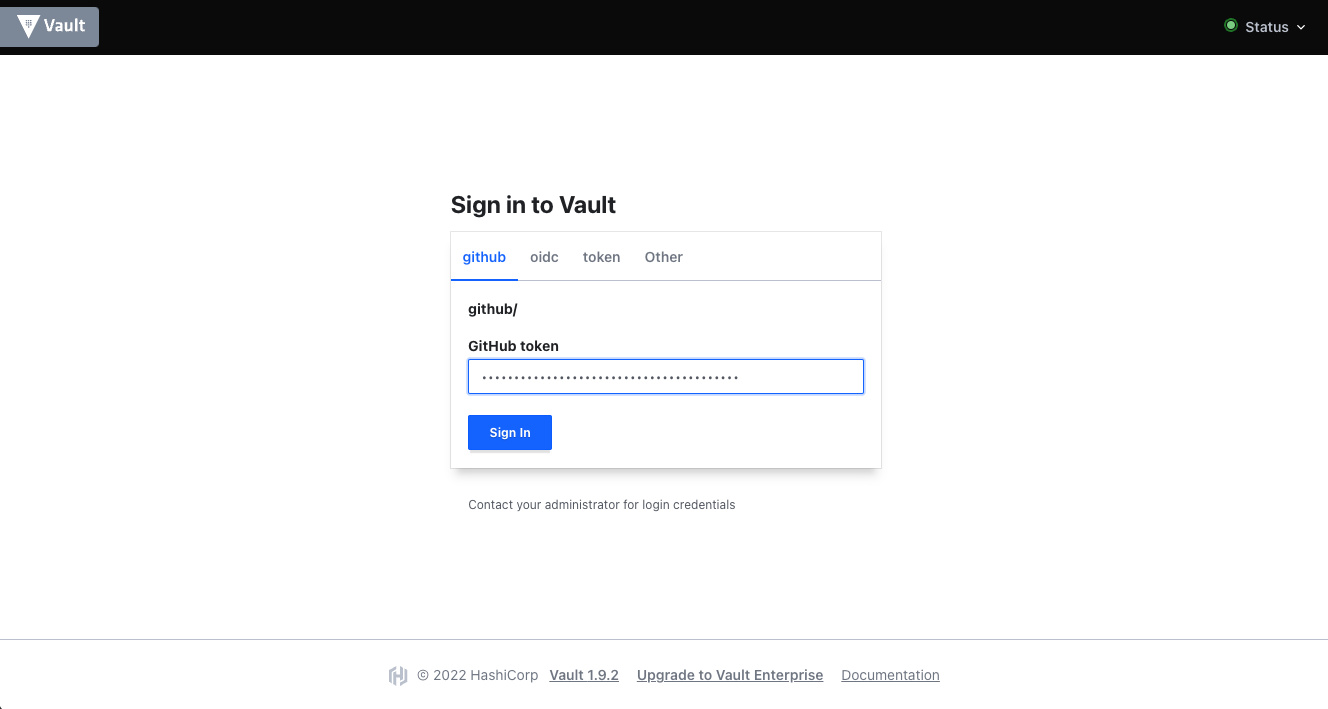
Copy and paste your GitHub PAT from your password manager application and hit sign in. Now you will be redirected to the available secret engines.
Login with vault CLI via GitHub PAT
You can also use the Vault CLI to manage your secrets. To log in with your CLI via GitHub PAT, you'll need to execute the following commands:
export VAULT_ADDR="https://vault.demo.catena-x.net:443"
export GH_TOKEN="YOUR_TOKEN"
vault login -method=github token=$GH_TOKEN
Login via vault token
Another login method is a token issued by Vault itself. As advantage over the GitHub PAT, the Vault token can only be
used in Vault and not in GitHub as well (security). Also, the TTL of Vault tokens is short-lived.
The following section shows you how to log in via Vault token that.
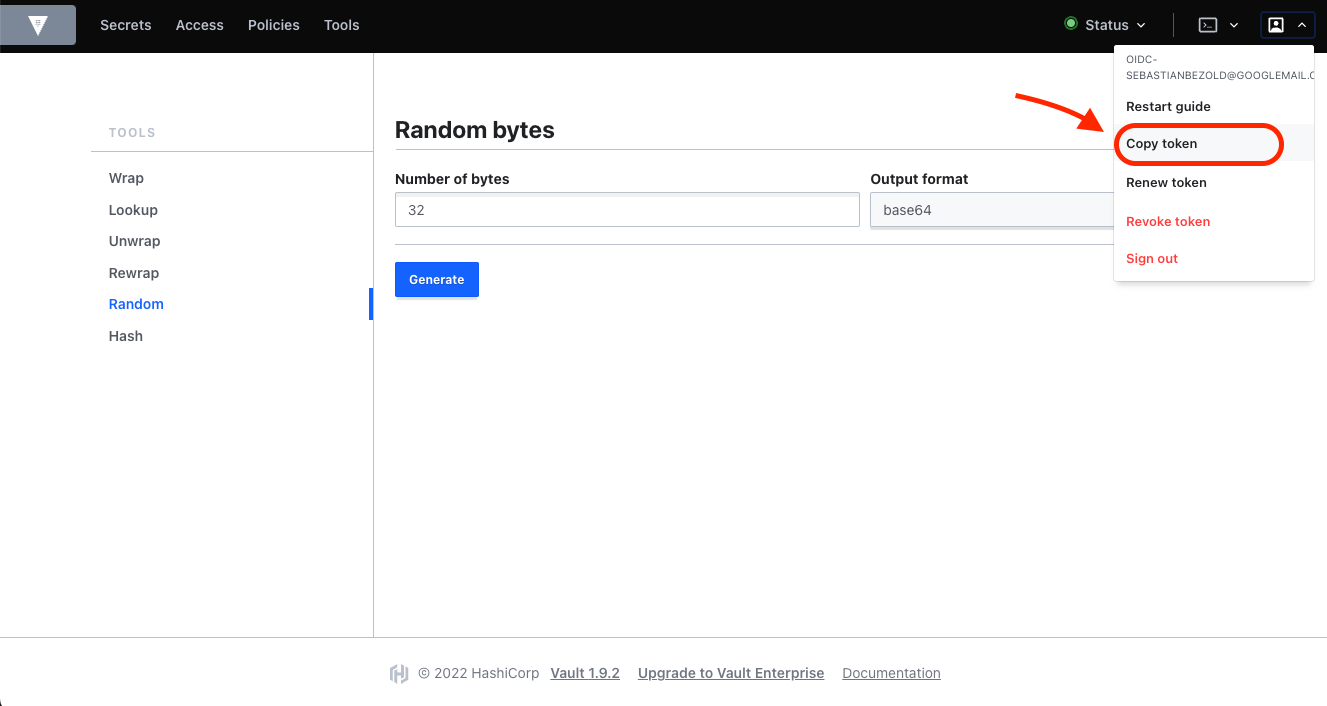
Create a Vault token
To create a token issued by Vault, you first have to be logged in via one of the other login methods. To get your login token, click Copy token from the user menu in the top right corner of the Vault web UI, like shown in the following screenshot:
Login to web UI via Vault token
If you want to edit or view secrets via Vaults web UI, you are not logged in yet and want to do that via token issued by Vault, you can select the token login method like shown in the following screenshot.
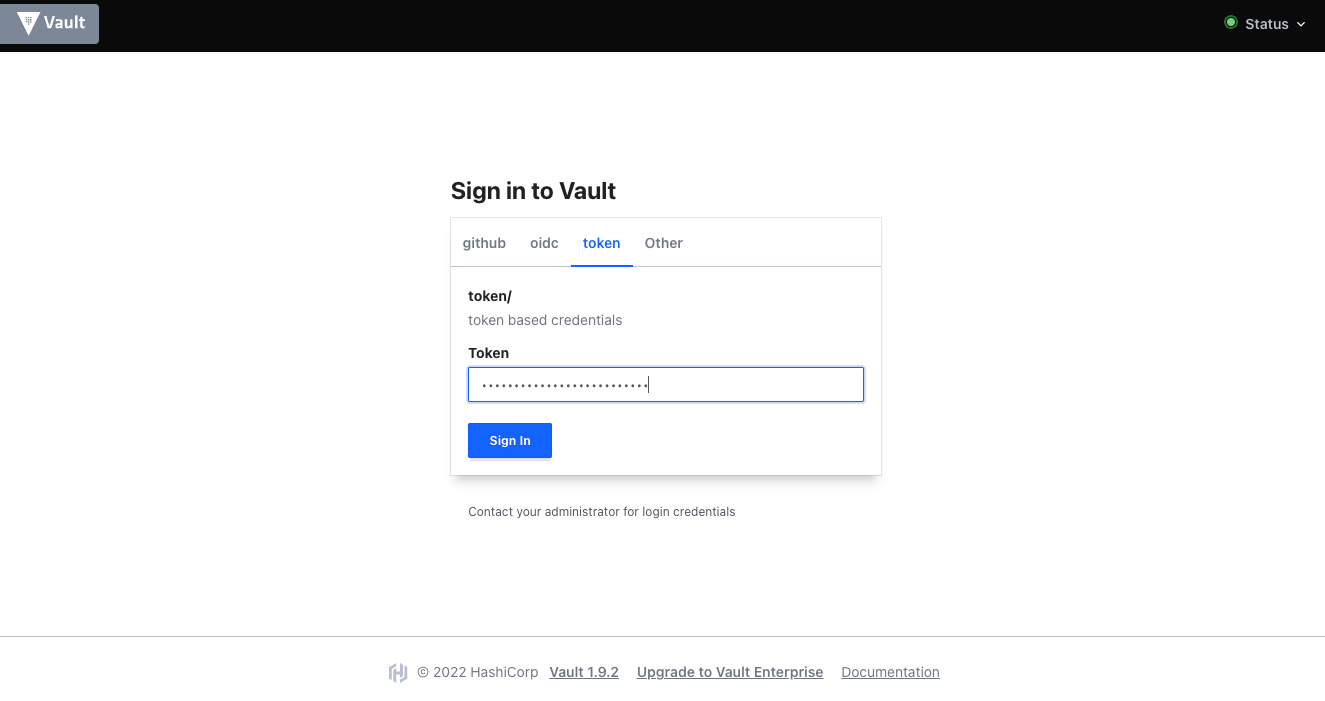
Copy and paste your previously collected token and log in. You'll be redirected to your available secret engines.
Login with vault CLI via Vault token
You can also use the Vault CLI to manage your secrets. To log in with your CLI via token issued by Vault, you'll need to execute the following steps:
export VAULT_ADDR="https://vault.demo.catena-x.net:443"
export VAULT_TOKEN="YOUR_TOKEN"
vault login -method=token token=$VAULT_TOKEN
Create A Secret
After you successfully logged into Vault via one of the previously described login methods, you can create and modify secrets in Vault. The following section shows you how to do that.
Vault WebUI
After login to Vault, you'll have access to the Vault secret engine(s) created for your product-team.
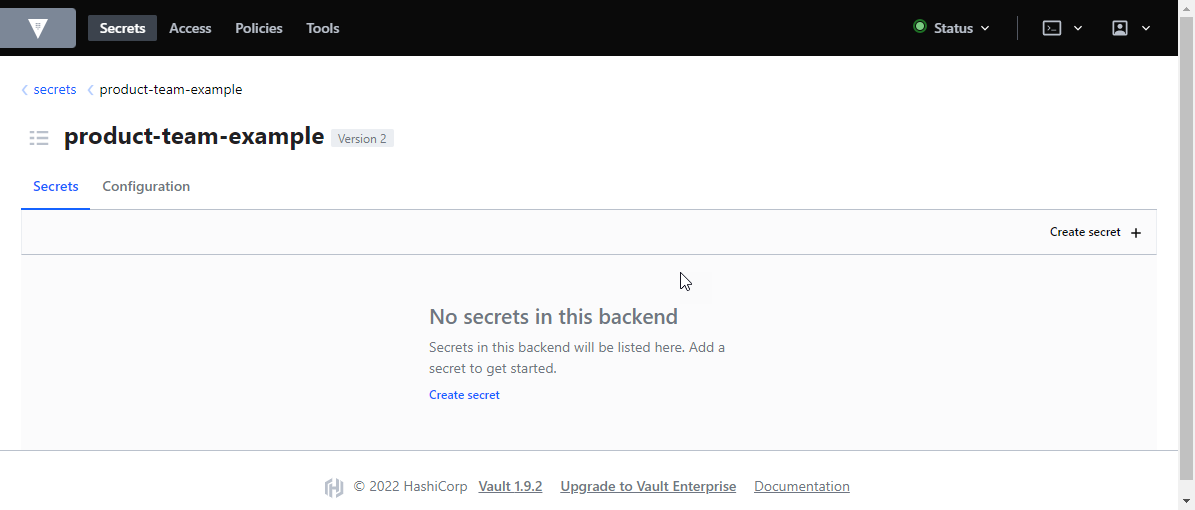
To create a secret
- click on Create secret + in the upper right area
- enter a Path for this secret, this will be the secret name
- add as many Secret data lines, as you require to store in this secret
- click on the Save button to store your first secret
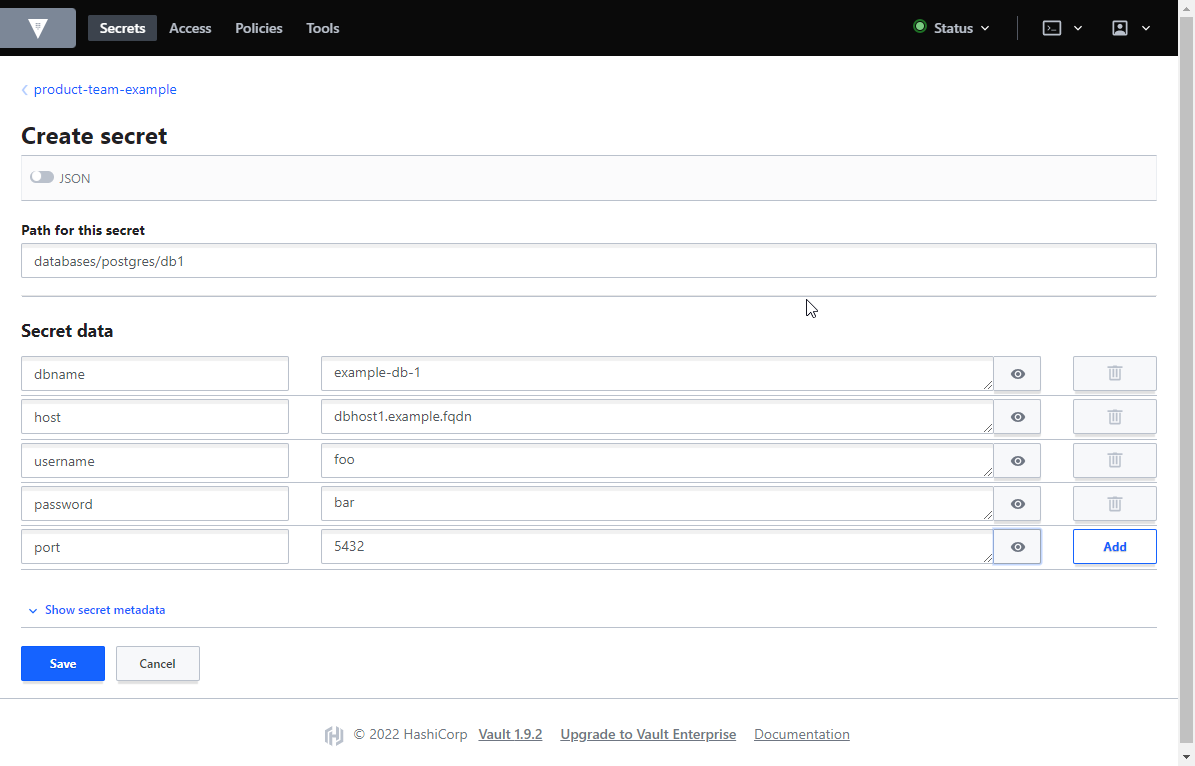 Secret data values have been made visible for demonstration purpose. By default values aren't visible in plain text.
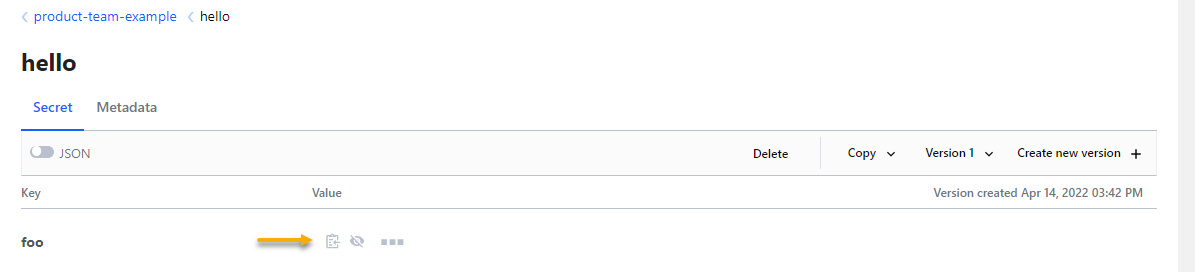
After you have created your first secret in Vault, the path is created inside your secret store and can be browsed easily.

We strongly suggest to organize secrets in folders based on its intention. Vault will automatically create folders, if you enter a specific path.
Vault Cli
To create a secret using the CLI execute the command vault kv put path/to/secret key1=value2 [key2=value2], example:
$ vault kv put product-team-example/hello foo=bar
========= Secret Path =========
product-team-example/data/hello

======= Metadata =======
Key                Value
---                -----
created_time       2022-04-14T13:42:08.41991265Z
custom_metadata    <nil>
deletion_time      n/a
destroyed          false
version            1
Read A Secret
Vault WebUI
Login to Vault and browse to the secret you need, and click on the copy icon.
Vault CLI
To read a secret using the CLI execute the command vault kv get path/to/secret, example:
$ vault kv get product-team-example/hello
========= Secret Path =========
product-team-example/data/hello

======= Metadata =======
Key                Value
---                -----
created_time       2022-04-14T13:42:08.41991265Z
custom_metadata    <nil>
deletion_time      n/a
destroyed          false
version            1

=== Data ===
Key    Value
---    -----
foo    bar
See Also
For further information about Hashicorp Vault please refer to their documentation.